

Bicycle Headset Cap & Bar End Installation Instructions
Installation guides for Dispatch Custom Cycling Components headset caps and bar end plugs and more.
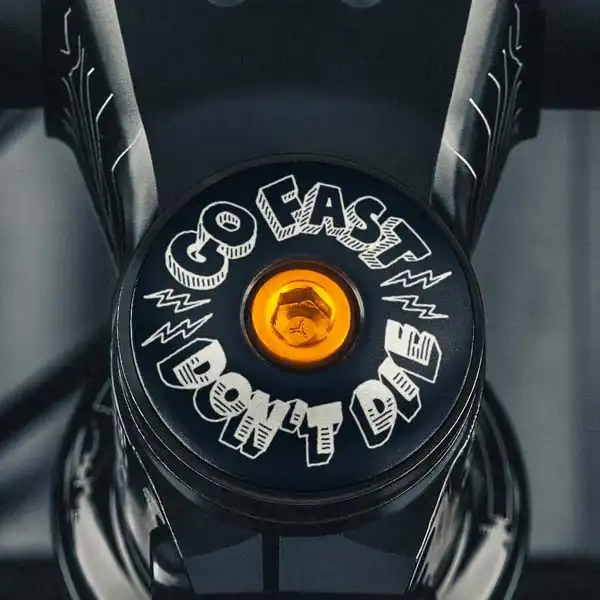
Standard Domed or Flat Headset Cap (hole in center)
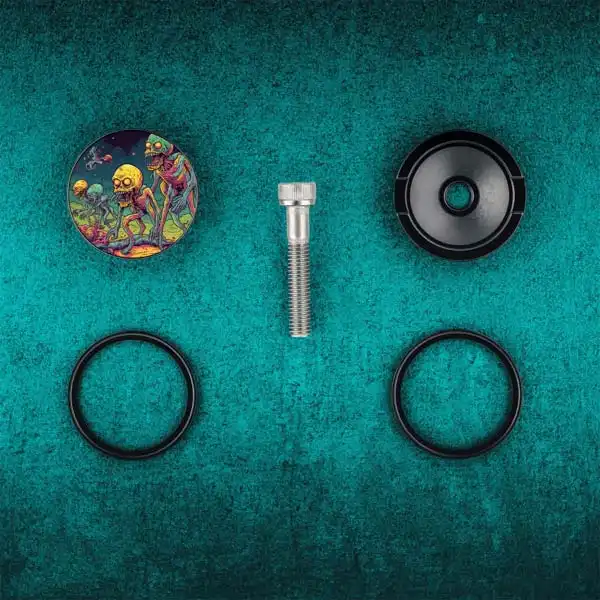
Shapeshifter Bicycle Headset Cap Installation Guide (No hole in center)

Please note these useful tips:
- Do not over-tighten your headset cap. It is not load bearing and just tight is tight enough.
- For color printed caps, use care when handling. While durable, they are not invincible and can be subjected to chipping or cracking ink if not cared for properly. All caps have an adhesion coating on their base to promote a long life, but abuse will defeat this layer.
- Do not use chemicals on your color printed headset caps. This also applies to laser engraved caps. This will reduce the lifespan and appearance of your cap. A damp rag will do fine if you find yourself in need of cleaning your caps.
- If you find your bolt is too short, you likely have a star nut that has not been installed properly (see Park Tools for more on the exact number of MM considered industry standard) and will either require a longer bolt or reuse your bolt that came on your bicycle.
- 25mm bar end plugs are generally suited for road and gravel handlebars. 32mm cover mountain handlebars nicely.
- If you detect looseness in your cockpit, seek the advice of your local bicycle mechanic. Common reasons for this include loose headset (not cap), loose stem or fork fitment issues.
- WARNING: HEADSET CAPS ARE NOT STRUCTURAL. OVER-TIGHTENING WILL NOT REDUCE SLACK IN YOUR COCKPIT.

We talk about cycling things, cycling inspired things, Dispatch news and our team of fast guys. Sign up!